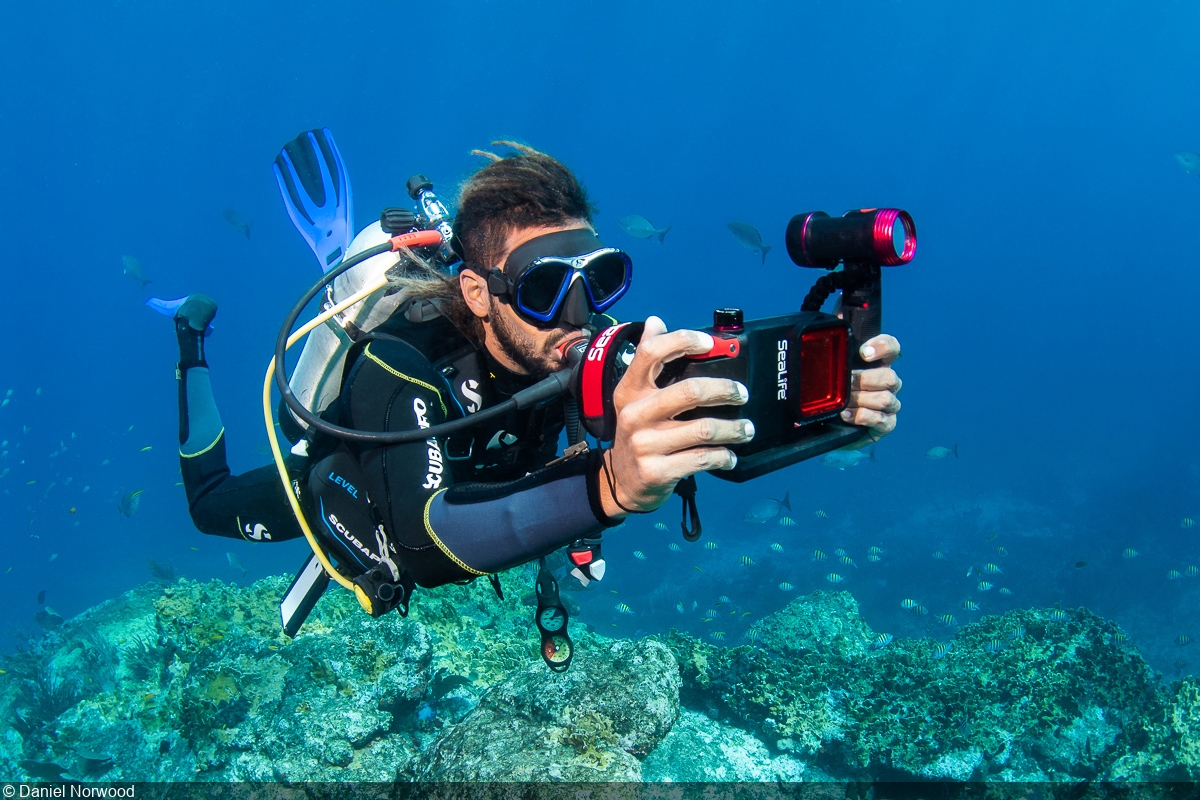
You surface from a dive, pull off your mask, and immediately start trying to describe what you saw. The colors, the textures, the way that octopus changed shape right in front of you. But words don't quite get there. Underwater photography lets you bring those moments back with you — and with today's gear, you don't need a professional budget or years of experience to start getting great shots.
Start with What You Have
The most common mistake beginners make is overthinking gear. You don't need a mirrorless camera in a $2,000 housing to take compelling underwater photos. A modern smartphone in a waterproof case will get you surprisingly far, especially while snorkeling or on shallow dives.
If you want to step up from a phone, a compact camera with an underwater housing is the sweet spot for most recreational divers. Models like the Olympus Tough series are built to go underwater without a separate housing at all, and they shoot in RAW for better editing flexibility. For more serious shooters, mirrorless cameras from Sony, Nikon, and Canon paired with dedicated housings from Ikelite, Nauticam, or Sea&Sea offer full creative control — but they also add weight, complexity, and cost.
The best camera underwater is the one you're comfortable using. If fiddling with settings pulls your attention away from buoyancy and breathing, simplify your setup.
Understand How Light Works Underwater
Light behaves differently underwater, and understanding how is the single biggest key to better photos. Water absorbs color progressively as you go deeper — red disappears first (around 15 feet), then orange, then yellow. By 60 feet, everything looks blue-green unless you add artificial light or correct in post-processing.
This is why underwater photos often look flat and monochrome straight out of the camera. There are three ways to bring color back:
Get close. The less water between your lens and the subject, the less color is lost. This is the golden rule of underwater photography. If you think you're close enough, get closer. Most beginners shoot from too far away, and the result is hazy, blue images with tiny subjects.
Use artificial light. An external strobe (flash) or video light restores the full color spectrum regardless of depth. Strobes are ideal for still photos — they freeze motion and light up the subject without illuminating the water column (which causes backscatter). Video lights work well for both video and photos but are less powerful. Even a small, affordable light makes a dramatic difference.
Use a red filter. If you're shooting with available light and no strobe, a red filter over your lens compensates for the lost red wavelengths. It's a simple, budget-friendly fix for snorkeling and shallow diving. Just remember to remove it above water or in very shallow conditions, or your photos will come out excessively warm.
Composition Still Matters
The same principles that make a good photo on land apply underwater — they're just harder to execute when you're floating in three dimensions with a regulator in your mouth.
Shoot upward when you can. Getting below your subject and angling the camera up places the subject against the blue water column or the surface, creating separation and drama. Shooting downward pins the subject against the reef, flattening the image.
Fill the frame. This ties back to getting close. A frame-filling portrait of a single fish is almost always more compelling than a wide shot with twenty fish as specks in the distance. Leave some negative space for the subject to "swim into" — position a fish heading into the frame, not out of it.
Watch your background. A cluttered or distracting background can ruin an otherwise great shot. Look for clean backdrops — open water, a smooth sandy bottom, or a contrasting section of reef. If the background is busy, use a wider aperture (lower f-number) to blur it, or reposition yourself.
Be patient. The best underwater photos come from sitting still and waiting, not from chasing subjects around the reef. Find an interesting patch of coral, settle into a comfortable position with good buoyancy, and let the marine life come to you. Fish that initially flee will often return within a minute or two once they realize you're not a threat.
Deal with the Challenges
Backscatter is the bane of underwater photographers. It's caused by your strobe illuminating particles suspended in the water — sand, plankton, sediment — creating a snowstorm of bright dots in your image. To minimize it, position your strobes wide and angled outward rather than pointing straight at the subject. This lights the subject from the sides while keeping the particles in the water column unlit. Avoid shooting in silty conditions or right after another diver has kicked up the bottom.
Focusing can be tricky in low light or low contrast conditions. Most cameras struggle with autofocus underwater because the reduced contrast gives the system less to lock onto. Switch to single-point autofocus and place the focus point on your subject's eye (for fish and marine animals, the eye is where sharpness matters most). If autofocus hunts, try pre-focusing on your hand at the approximate distance, then locking focus before recomposing.
Buoyancy while shooting is the practical challenge nobody warns you about. Holding a camera changes your trim and balance in the water. Practice shooting while maintaining neutral buoyancy — if you find yourself sinking or rising every time you bring the camera to your eye, work on your weighting and body position before worrying about settings.
Edit Your Photos
Even the best underwater images need some post-processing. The minimum adjustments for most shots include white balance correction (shift it warmer to counteract the blue cast), a bump in contrast to cut through the haze, and some selective color adjustment to bring back reds and oranges.
Lightroom, Capture One, and even phone apps like Snapseed handle these corrections well. If you're shooting in RAW format (and you should be, if your camera supports it), you'll have far more latitude to recover color and detail than with JPEGs.
One common pitfall: oversaturating. It's tempting to crank the saturation slider to make those reef colors pop, but restraint produces more natural, believable images. If the coral looks neon, you've gone too far.
Respect the Reef While You Shoot
Photography adds task loading to a dive — your attention is split between the camera and your diving fundamentals. This makes it easy to accidentally bump into coral, drag equipment across the reef, or chase animals for a better angle.
A few ground rules: never touch, move, or manipulate marine life for a photo. Don't rest your camera on coral. Don't use a pointer or stick to prod animals into a "better" position. And if getting the shot requires compromising your buoyancy or getting dangerously close to the reef, skip it. There will always be another opportunity.
The best underwater photographers are also the best divers. Solid buoyancy, calm movements, and reef awareness aren't just ethical — they lead to better photos, too.
Identify Your Subjects
Half the joy of underwater photography is knowing what you captured. That striking nudibranch, the juvenile fish hiding in the coral, the ray that glided past — they all have names and stories. Next time you're scrolling through your dive photos, open iSea and let our AI identify the species. It turns a good photo into a learning experience and makes your dive log infinitely more interesting.
Name every species in your dive photos
AI-powered marine life identification — free to download.